9 STEPS TO SOLID INTERIOR FLATWORK
Interior Flatwork Material
Selecting the right material for interior flatwork is essential for achieving both functionality and aesthetic appeal. Cousins Concrete Services INC offers a variety of high-quality materials suitable for interior applications, including polished concrete, stained concrete, and decorative overlays. Each material presents unique advantages, from the sleek and modern look of polished concrete to the customizable designs of stained concrete and overlays. Our team works closely with clients to understand their preferences and project requirements, recommending the most suitable material to enhance the beauty and functionality of their indoor spaces. With our commitment to excellence and innovation, Cousins ensures your interior flatwork exceeds expectations, providing durable and visually stunning surfaces.


Interior Flatwork Process
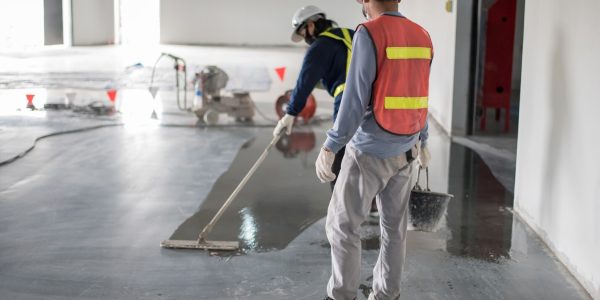
The interior flatwork process demands precision and expertise to create smooth, durable, and visually appealing indoor surfaces. Cousins Concrete Services INC employs a meticulous approach to interior flatwork, beginning with thorough surface preparation to ensure proper adhesion and longevity. Our skilled craftsmen then expertly pour and finish the concrete, utilizing techniques such as troweling, staining, and polishing to achieve the desired texture and appearance. Whether it’s a seamless polished floor or intricately designed decorative overlay, we prioritize quality and attention to detail in every step of the process. With Cousins, you can trust that your interior flatwork will enhance the beauty and functionality of your space, exceeding your expectations for years to come.
1. DESIGN AND PERMITTING
The Concrete Guys stay involved with our clients from the design of the foundation through final approval of the floors. Our Design Manager confirms the blueprints and permits with the builder for the interior flatwork. This step in the construction process assures that the basement and garage floors are pour to the desired specification of the homeowner.
2. VAPOR BARRIER
Next, our team confirms that the footings and walls are to code. We then make sure that there is the proper amount to gravel before we install the vapor barrier.
3. INSPECTION
Before any concrete can be poured, our team calls the local building inspector and awaits approval to move forward.
4. PLACING CONCRETE
We then pour concrete on top of the vapor barrier to create a concrete slab. While the concrete is being poured, we use shovels, rakes and “come alongs” (special concrete rake) to move the concrete to make sure there are no voids or air pockets.
5. EARLY FINISHING
Our flat work team then uses a large metal or wood board to screed the top of the concrete. Screeding helps compact and consolidate the concrete and begins the smoothing and leveling process. Next, we use a float to further even out any high or low areas, and create a smooth finish. Small hand-held floats are used for the edges and detail work, large bull floats are used for working large areas. At the same time, we work the control joints and edges into the concrete with special hand tools.
6. TROWELING
If the concrete will receive a rough broom finish, no additional finishing may be needed. If the concrete will be smooth toweled or stamped, a steel trowel finish is needed. We let the concrete rest until the surface begins to firm up. Once firm, we use a steel trowel or troweling machine to create a smooth, hard, and uniform finish. Steel troweling can be done by “skating” across the surface on knee boards, troweling small areas at a time, or with tools on long poles known as “fresnos” or “funny trowels”.
7. FINAL FINISHING
Once all the troweling is complete the final finish can be applied to the concrete. The most basic type of finish is known as a “broom finish”. A special broom is pulled across the concrete surface creating a rough textured surface. Other types of finishes include stamped, textured, or smooth trowel to name a few.
8. CURING
We then let the concrete rest and begin to cure (get hard). The curing process lasts 28 days, with the first 48 hours being the most critical. We apply a liquid chemical curing and sealing compound to the garage floor to help the concrete cure slowly and evenly, which helps reduce cracks, curling, and surface discoloration. Clients can start to use the concrete for light foot traffic 1 to 3 days after placement and can drive and park on your concrete 10 to 15 days after placement (certain weather can affect this timing).
9. QUALITY CONTROL INSPECTION
A Concrete Guys manager reviews the site to ensure that the TCG ‘Green Tags’ are issued, and the project receives final sign off. This brings our process to a successful conclusion.

